|
12/31/2018 0 Comments DIY Holiday Village in a Jar Christmas is getting close, and if you're in need of a last-minute decorating or centerpiece idea, I've got one for you! How about a little holiday village in a jar? It's fast, easy, and can be replicated in so many different variations, it's the perfect solution to all your holiday decorating conundrums. Last week I did a little insta-story about how to put together this simple holiday decoration. If you don't already follow me on Instagram, you totally should! I think you'd like me over there! I post and story more frequently than I write blog posts. It's just more informal and so much fun to interact with the people who follow me! Here is what you'll need to create your own little holiday village in a jar:
Now, I feel like this is all very self-explanatory, but just for fun, I'll tell you how I created this guy. First, I put in some fake snow, then I placed the house ornament and trees, and last I stuffed the light in. You just have to kind of adjust all the pieces until it all fits in the jar without knocking into each other. I found the perfect little spot for my village in a jar right by the front door. It looks so darn cute all lit up at night. Miss L. loves to flip these lights on and off. What is it about kids and switches? She's really having a ball turning on alll the holiday lights and off in our house this year. She also thinks it's hilarious to switch our Christmas tree lights from all white (my favorite) to colored (her favorite) when I leave the room. That's all I got, kids! I hope you have a great day! xo The post DIY Holiday Village in a Jar appeared first on House by Hoff.
0 Comments
We're in the final countdown to Christmas! If you're wanting to take your holiday decor up a notch or two, today's post will show you how to give your garlands and wreaths a quick makeover. Not only are these greenery upgrades affordable, they're perfect for transitioning your Christmas decorations into New Year's Eve decor. By starting with basic holiday greenery (from the green to the frosted), you can have a designer look in no time. Feel free to choose faux greenery so you can reuse your decor next year! Keep reading for all of the hassle-free DIY details…
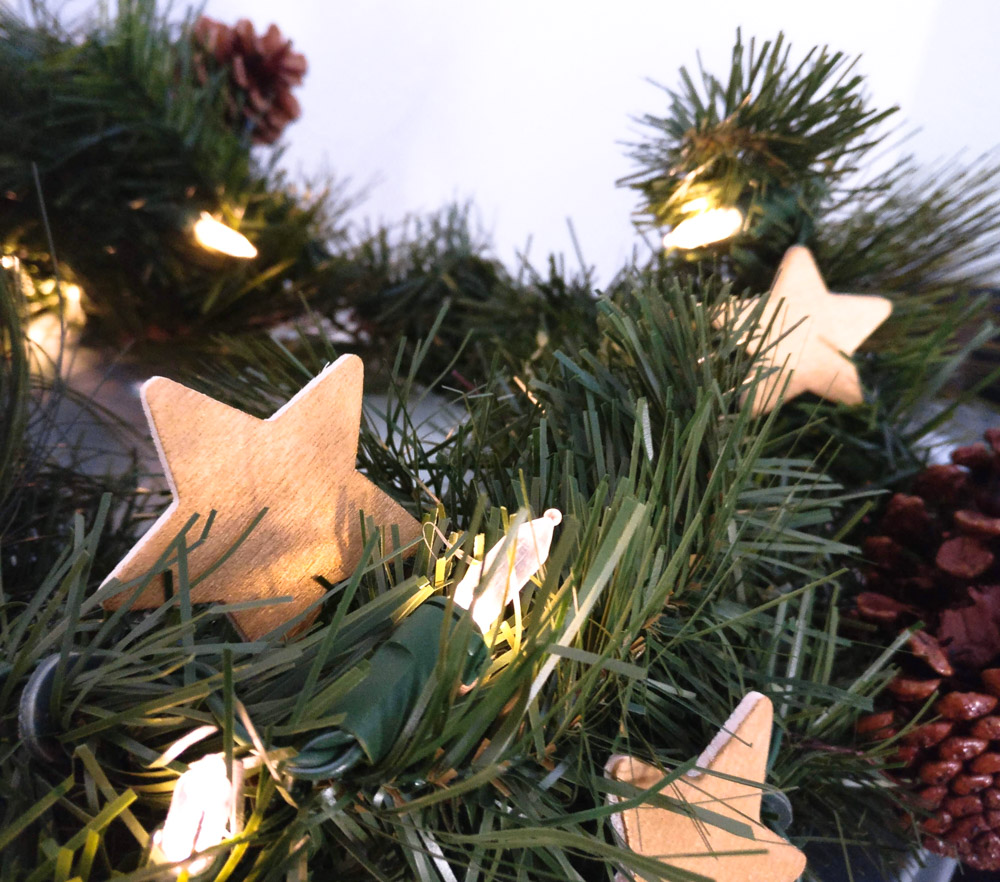
        *Photos and styling by Kate Simmons Gold Star GarlandThis first holiday greenery upgrade gives a nod to Scandinavian style. There's something so whimsical about gold stars. When they're wooden, the result is an earthy, modern look that beautifully complements the greenery of your choice!
Start with wooden craft stars. I ordered these from JOANN for a mere $4.99 a bag:
Paint your stars gold, or leave them untouched for a rustic look. Keep in mind that even painting them a “fancy” color like gold doesn't strip them of their simplicity and charm, especially if you leave the edges unfinished:
Display your stars by tucking them into your holiday garland. If you don't have a garland, rest assured there are some very affordable options out there (many of them pre-lit)! A dab of hot glue will secure the stars in place if need be. Avoid gluing them to wires or lights if your garland features lighting.
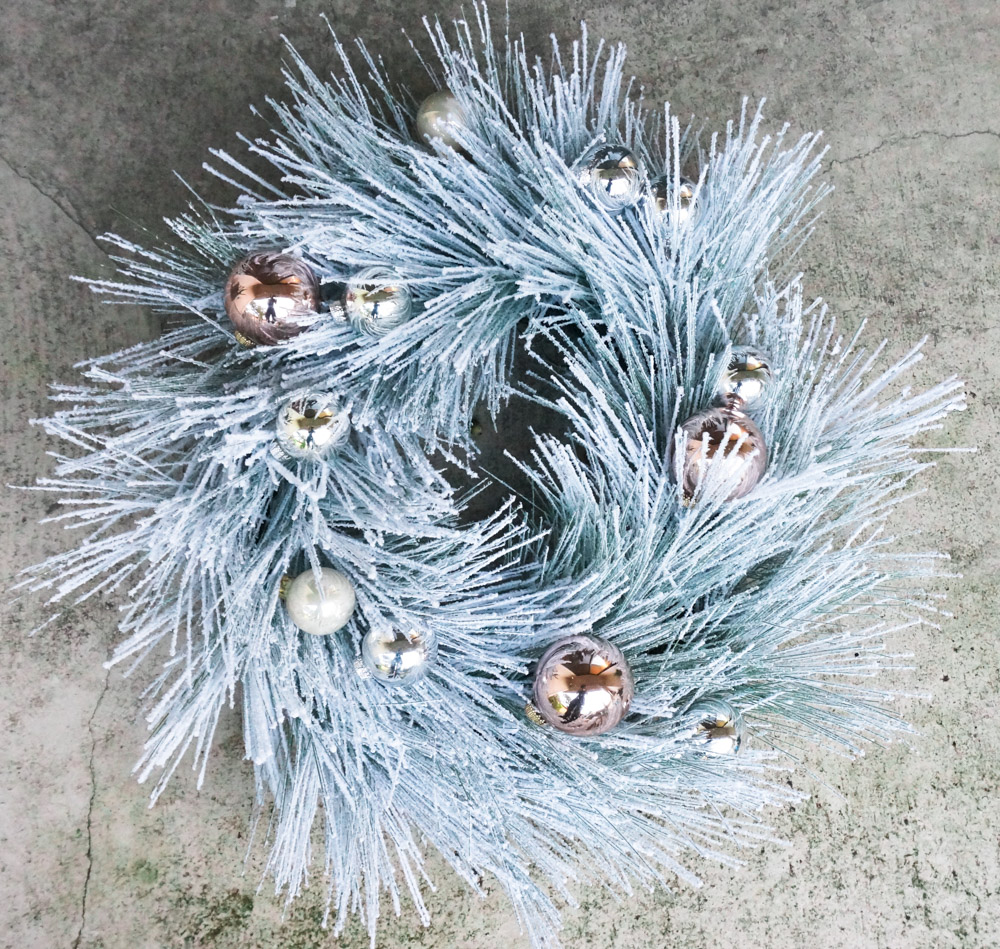
Metallic Ornament WreathThis next greenery upgrade idea involves metallic ball ornaments in various sizes. You can go with the budget-friendly ornaments you'll find at most craft stores in boxed sets, or you can opt for more ornate selections. The choice is yours! Bonus points if you incorporate a range of hues (from silver to rose gold). In fact, it's precisely this variety in tone that creates an upscale monochromatic look.
As you can see from the image below, metallic ornaments bring flocked greenery to life. Note how ornaments in rose gold, silver and pearl enhance a lovely artificial pine wreath from CB2:
It's that easy! Simply secure the ball ornaments to the wreath (we tied ours with string), and you're set.
Will you be taking your holiday greenery to new heights this year? You don't have to break the bank to get a high-end look. The magic is in the details! Happy Holidays! You're reading 2 Easy Ways to Dress Up Holiday Greenery, originally posted on Decoist. If you enjoyed this post, be sure to follow Decoist on Twitter, Facebook and Pinterest.  2018 is coming to an end. I hope you enjoyed my free calendar throughout the year. If you have not had a chance to grab them you can find them all HERE. For 2019 I wanted to go with a simple black and white theme. This will be perfect for those of you who prefer to save on ink or who don't have the option of printing in color. We're in the final countdown to Christmas! If you're wanting to take your holiday decor up a notch or two, today's post will show you how to give your garlands and wreaths a quick makeover. Not only are these greenery upgrades affordable, they're perfect for transitioning your Christmas decorations into New Year's Eve decor. By starting with basic holiday greenery (from the green to the frosted), you can have a designer look in no time. Feel free to choose faux greenery so you can reuse your decor next year! Keep reading for all of the hassle-free DIY details…
*Photos and styling by Kate Simmons Gold Star GarlandThis first holiday greenery upgrade gives a nod to Scandinavian style. There's something so whimsical about gold stars. When they're wooden, the result is an earthy, modern look that beautifully complements the greenery of your choice!
Start with wooden craft stars. I ordered these from JOANN for a mere $4.99 a bag:
Paint your stars gold, or leave them untouched for a rustic look. Keep in mind that even painting them a “fancy” color like gold doesn't strip them of their simplicity and charm, especially if you leave the edges unfinished:
Display your stars by tucking them into your holiday garland. If you don't have a garland, rest assured there are some very affordable options out there (many of them pre-lit)! A dab of hot glue will secure the stars in place if need be. Avoid gluing them to wires or lights if your garland features lighting.
Metallic Ornament WreathThis next greenery upgrade idea involves metallic ball ornaments in various sizes. You can go with the budget-friendly ornaments you'll find at most craft stores in boxed sets, or you can opt for more ornate selections. The choice is yours! Bonus points if you incorporate a range of hues (from silver to rose gold). In fact, it's precisely this variety in tone that creates an upscale monochromatic look.
As you can see from the image below, metallic ornaments bring flocked greenery to life. Note how ornaments in rose gold, silver and pearl enhance a lovely artificial pine wreath from CB2:
It's that easy! Simply secure the ball ornaments to the wreath (we tied ours with string), and you're set.
Will you be taking your holiday greenery to new heights this year? You don't have to break the bank to get a high-end look. The magic is in the details! Happy Holidays! You're reading 2 Easy Ways to Dress Up Holiday Greenery, originally posted on Decoist. If you enjoyed this post, be sure to follow Decoist on Twitter, Facebook and Pinterest. 12/28/2018 0 Comments How Gratitude Helps FinancesThanksgiving is my favorite holiday. It's about family and being thankful. And food. You might be surprised, too, when you find that gratitude helps finances. I love Thanksgiving. Instead of exchanging gifts, family and friends come together to share a meal, make memories, and be joyful. (At least, that's the theory.) To me, it's always been the final day before we plunge into the crass commercialism that often marks the holiday season.
Gratitude in your life isn't just nice for one day, though. The act of being thankful and practicing gratitude can actually help your finances. I actually wrote about it for The Balance, and here some of the takeaways from that article. Contentment = Less Desire for More ThingsFirst of all, gratitude tends to come with feelings of contentment. When you're content, the desire for more things is lower. I know that when I am content with my life, retail therapy isn't needed. Gratitude helps us recognize what we already have, and it encourages us to be thankful. When we recognize what we have, and we are happy with it, there isn't as a great a need to spend money in an attempt to fill that void. It's easy to see how gratitude helps finances when you aren't spending on fripperies that end up costing you a lot more in the end. Better Health = Lower CostsGratitude can also result in better health outcomes. Gratitude lowers stress levels and can improve your wellbeing. And, as we know, healthcare is a huge cost in this country. By adding thankfulness to your life, you can improve your health and save money on healthcare costs. There's a practical way gratitude helps finances! Plus, you have the bonus of a higher quality of life. Generosity = Smarter SpendingGiving away money can actually make you better at managing it? It's true! When you're grateful, you're more likely to live generously. And I've noticed in my own life that when I live life generously, I tend to have better finances. Some folks might say that it has something to do with a Law of Attraction or Karma, or something similar. And maybe it does. But on a boring, practical level, I know that because I prioritize charitable giving, it forces me to look at my finances, manage my money, and make sure I can do what I want with my money. Understanding my values, and making sure my financial priorities match up, leaves my finances in better shape. When you spend according to your values, when you have a plan, your finances are almost always helped. Gratitude helps finances in ways that are very real. Have you noticed this in your own life? How has gratitude helped your finances?
How Gratitude Helps Finances appeared first on Planting Money Seeds. 12/28/2018 0 Comments Favorite Features of 2018With only a few days left of 2018, we reflect on some of the many projects we've completed and look forward to the many new projects of next year! 2018 consisted of 36 new residential clients, several repeat clients, and also our single largest project sold in Kitchen Design Concepts history! Phew! What a year! Thank you to all our clients, designers, vendors, and other design professionals for making this year yet another successful one! In the spirit of 2018, here are some of our favorite projects we've featured: Hollywood-Glam HomeThis is one of our favorite projects to date as it's been one of the more unique projects we've completed. We were able to have fun with materials and incorporate shiny surfaces and incorporate unique pathways (a curved island in the kitchen). Check out the details of the projects by clicking “Kitchen” or “Master Bath” below: Kitchen
|
AuthorWrite something about yourself. No need to be fancy, just an overview. Archives
January 2019
Categories |


 RSS Feed
